i.MX RT1050 简单上手
600MHz的CM7能做什么?

前言
i.MX RT1050大概是能买到的比较便宜的Cortex-M7 MCU了,本文介绍从裸Linux环境开始配置完整工作环境。
一、硬件准备
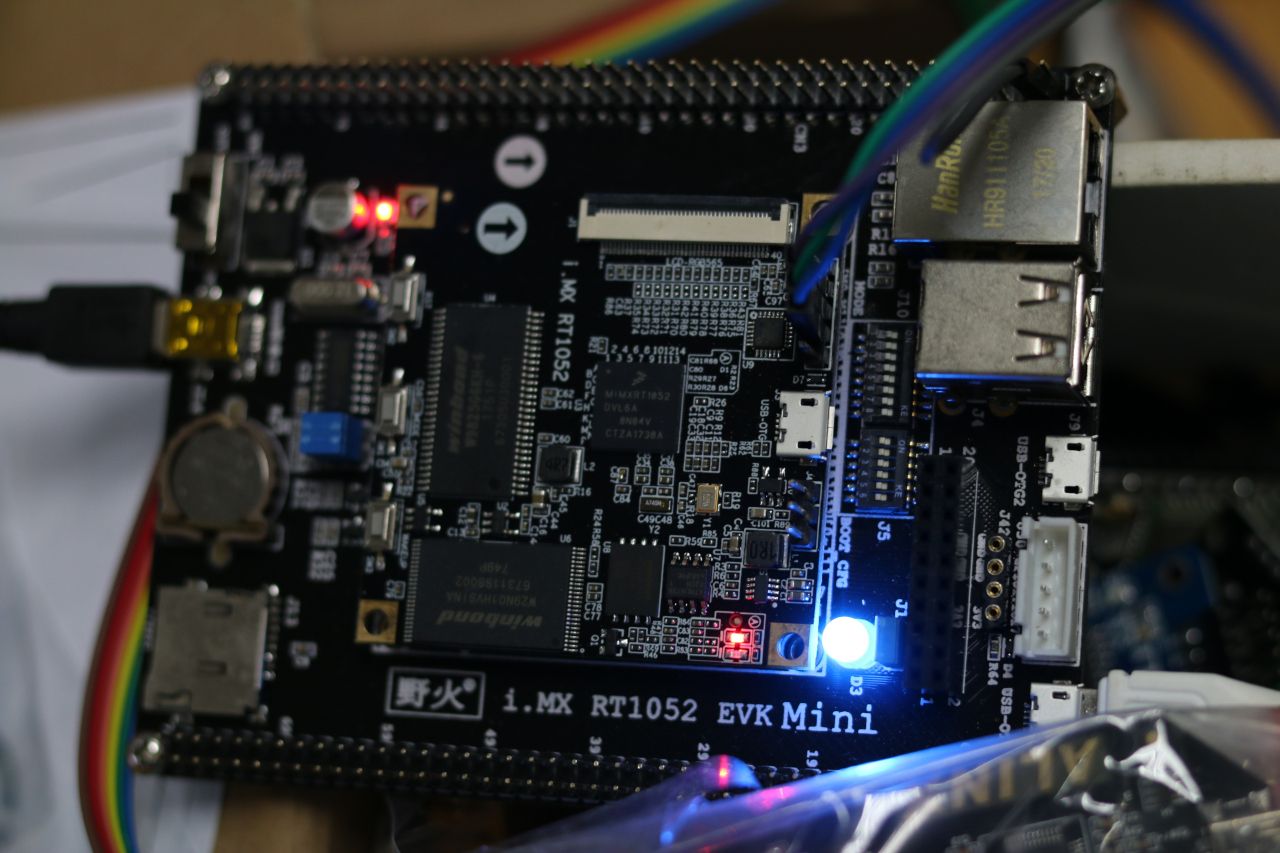
- i.MX RT1050开发板
- JTAG/SWD调试器
- 足够多的USB线和杜邦线
二、软件准备
- ARM GCC(任意版本,>= 7)
- CMake
- OpenOCD(越新越好)
- 文本编辑器(任意)
三、OpenOCD调试环境准备
- 在任意位置保存如下target配置
# NXP i.MX RT1050 family (Arm Cortex-M7 @ 600 MHz)
#

if { [info exists CHIPNAME] } {
        set _CHIPNAME $CHIPNAME
} else {
        set _CHIPNAME imxrt1050
}

source [find target/swj-dp.tcl]

if { [info exists CPU_SWD_TAPID] } {
        set _CPU_SWD_TAPID $CPU_SWD_TAPID
} else {
        set _CPU_SWD_TAPID 0x0bd11477
}

if { [using_jtag] } {
        set _CPU_TAPID 0
} else {
        set _CPU_TAPID $_CPU_SWD_TAPID
}

swj_newdap $_CHIPNAME cpu -irlen 4 -expected-id $_CPU_TAPID

set _TARGETNAME $_CHIPNAME
dap create $_TARGETNAME.dap -chain-position $_TARGETNAME.cpu
target create $_TARGETNAME cortex_m -dap $_TARGETNAME.dap

if { ![using_hla] } {
        cortex_m reset_config sysresetreq
}

gdb_breakpoint_override hard # 调试XIP Flash应用时,见说明

adapter_khz 1000
- 根据你的JTAG Adapter,选择合适的配置文件
- 运行OpenOCD,直到看到类似的消息代表识别成功
- OpenOCD会自动选择断点模式,Flash区域应使用硬件断点,否则无法命中。由于i.MX RT1050 无片上Flash,Config中并未加入Flash bank的定义,而是强制全局使用硬件断点以避免这种情况。RT1050的Cortex-M7拥有8个硬件断点,这对于大多数调试情况都足够了。个人使用时也可以加入自己板子定义的Flash区域,但目前(2018.12现在)OpenOCD并不支持RT1050的Flash读写,所以仅能用来自动配置断点类型。
imi415@imi415 ~ % openocd -f ~/Documents/Conf/OpenOCD/interface/ft232-swd.cfg -f ~/Documents/Conf/OpenOCD/target/imxrt1050.cfg
Open On-Chip Debugger 0.10.0+dev-00523-g2a3b709aa (2018-08-30-22:25)
Licensed under GNU GPL v2
For bug reports, read
	http://openocd.org/doc/doxygen/bugs.html
Info : FTDI SWD mode enabled
adapter speed: 2000 kHz
cortex_m reset_config sysresetreq
adapter speed: 1000 kHz
Info : Listening on port 6666 for tcl connections
Info : Listening on port 4444 for telnet connections
Info : clock speed 1000 kHz
Info : SWD DPIDR 0x0bd11477
Info : imxrt1050: hardware has 8 breakpoints, 4 watchpoints
Info : Listening on port 3333 for gdb connections
四、示例工程准备
- 从 https://mcuxpresso.nxp.com/en/dashboard 添加并下载i.MX RT1050的SDK,根据芯片型号选择对应的SDK。(测试中Rev.1 和Rev.2可以互换但不建议使用)
- 从NXP网站下载 Config Tool。
- 解压deb,选择合适的位置放置Config Tool,运行
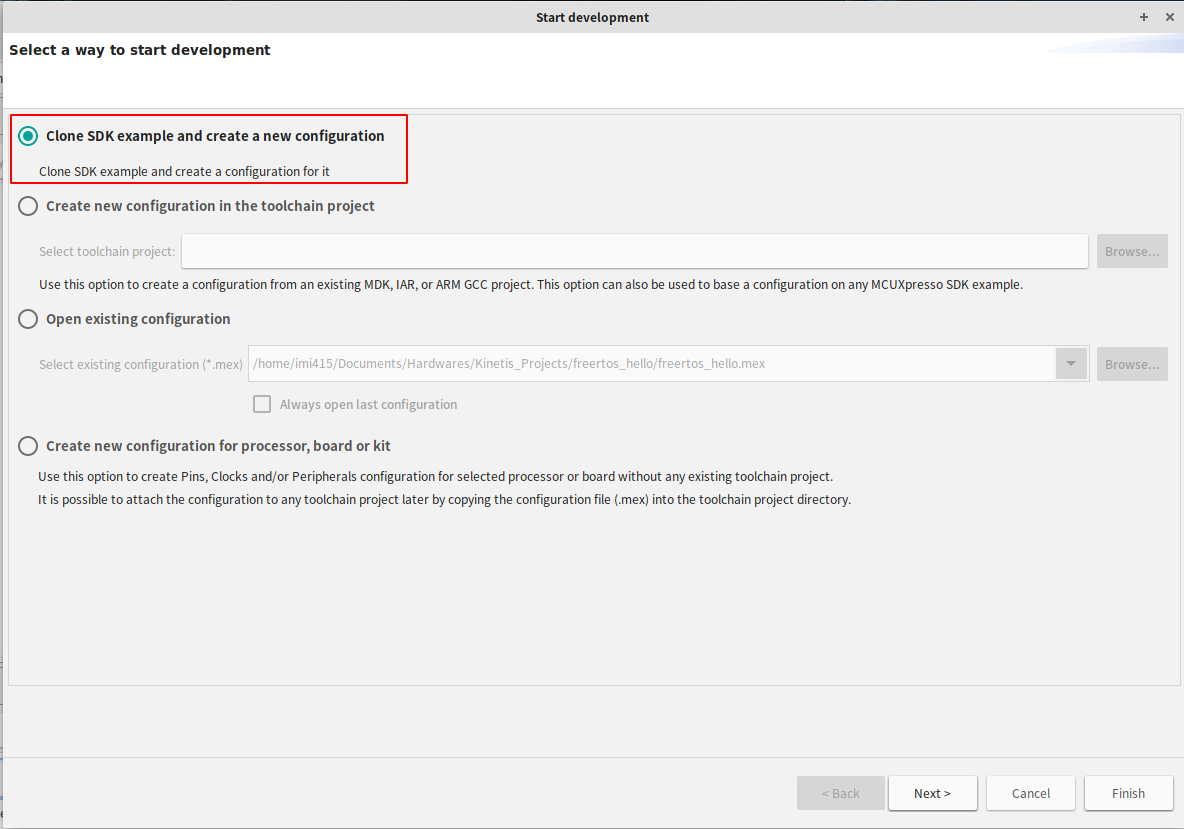
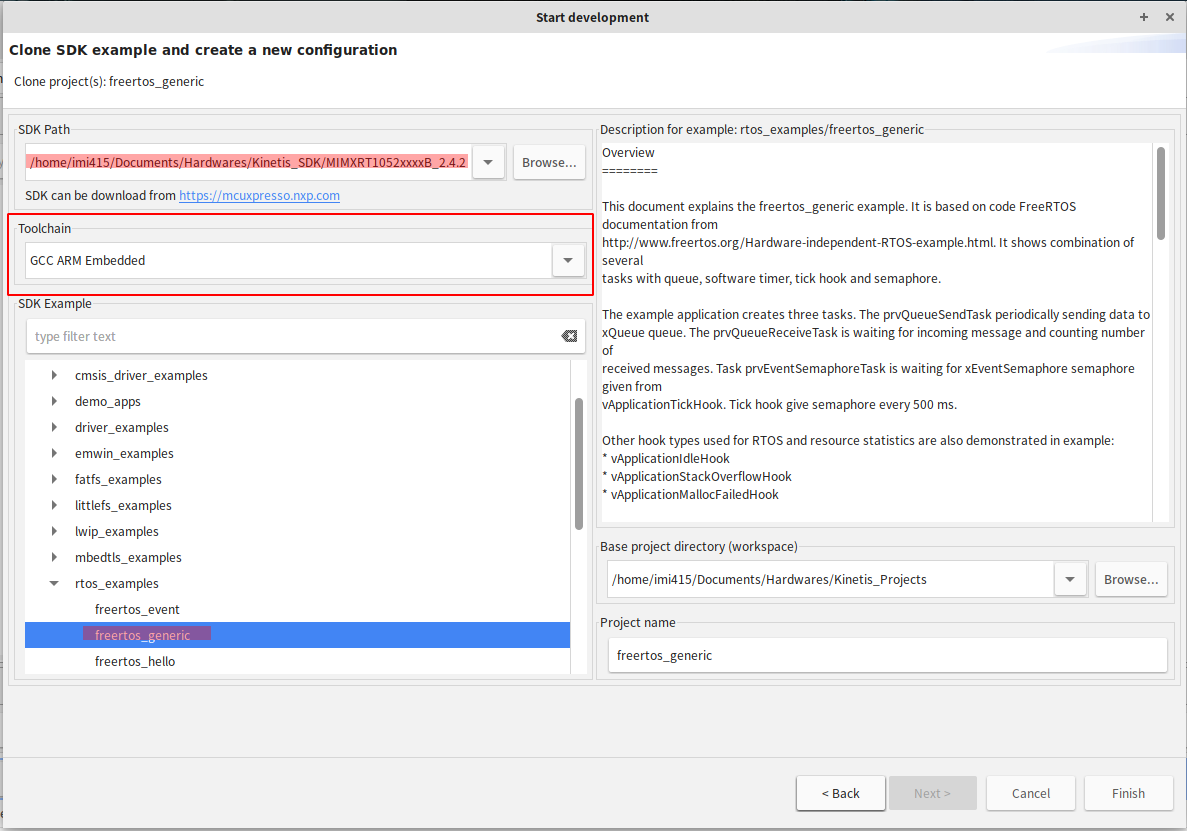
/path/to/config_tool/bin/tool并选择解压到SDK的位置,从示例创建新工程,类型选择ARM GCC。


五、编译示例工程
- 在工程目录中运行
ARMGCC_DIR=/path/to/arm_gcc ./build_debug.sh即可编译出ELF - 在工程目录中运行
ARMGCC_DIR=/path/to/arm_gcc ./build_flexspi_nor_debug.sh - 由于第二步中我们选择了flexspi_nor配置,该程序将被链接进FlexSPI NOR Flash区域(
0x60000000);第一步中的ELF则被链接进SRAM区域。
六、调试
- 运行GDB连接OpenOCD并加载elf,载入ELF到设备SRAM并跳转入口点即可开始调试(注:事先需要halt CPU)
- 以下步骤中continue位置不建议使用,应使用
jump *entry_point跳转程序入口点开始执行。 - 本例中程序入口点位于
0x468,即jump *0x468。
130 imi415@imi415 ..dwares/Kinetis_Projects/freertos_hello % arm-none-eabi-gdb -ex "target remote localhost:3333" debug/freertos_hello.elf                                                                                                  :(
GNU gdb (GDB) 8.1.1
Copyright (C) 2018 Free Software Foundation, Inc.
License GPLv3+: GNU GPL version 3 or later <http://gnu.org/licenses/gpl.html>
This is free software: you are free to change and redistribute it.
There is NO WARRANTY, to the extent permitted by law.  Type "show copying"
and "show warranty" for details.
This GDB was configured as "--host=x86_64-pc-linux-gnu --target=arm-none-eabi".
Type "show configuration" for configuration details.
For bug reporting instructions, please see:
<http://www.gnu.org/software/gdb/bugs/>.
Find the GDB manual and other documentation resources online at:
<http://www.gnu.org/software/gdb/documentation/>.
For help, type "help".
Type "apropos word" to search for commands related to "word"...
Reading symbols from debug/freertos_hello.elf...done.
Remote debugging using localhost:3333
0x600044d6 in ?? ()
(gdb) load
Loading section .interrupts, size 0x400 lma 0x0
Loading section .text, size 0x5c08 lma 0x400
Loading section .ARM, size 0x8 lma 0x6008
Loading section .init_array, size 0x4 lma 0x6010
Loading section .fini_array, size 0x4 lma 0x6014
Loading section .data, size 0x6c lma 0x6018
Start address 0x468, load size 24708
Transfer rate: 69 KB/sec, 3529 bytes/write.
(gdb) b main
Breakpoint 1 at 0x4afa: file /home/imi415/Documents/Hardwares/Kinetis_Projects/freertos_hello/source/freertos_hello.c, line 68.
(gdb) c
Continuing.

Breakpoint 1, main () at /home/imi415/Documents/Hardwares/Kinetis_Projects/freertos_hello/source/freertos_hello.c:68
68	    BOARD_ConfigMPU();
(gdb)
七、下载程序到FlexSPI NOR Flash 并启用XIP
- 根据开发板制造商的参数修改
xip目录下文件,配置XIP Header。 - NOR Flash XIP Header类似下方
#include "fire_imxrt1050_flexspi_nor_config.h"

/*******************************************************************************
 * Code
 ******************************************************************************/
#if defined(XIP_BOOT_HEADER_ENABLE) && (XIP_BOOT_HEADER_ENABLE == 1)
#if defined(__CC_ARM) || defined(__GNUC__)
__attribute__((section(".boot_hdr.conf")))
#elif defined(__ICCARM__)
#pragma location = ".boot_hdr.conf"
#endif

const flexspi_nor_config_t spiflash_config = {
    .memConfig =
        {
            .tag = FLEXSPI_CFG_BLK_TAG,                                   /*标志:FCFB*/
            .version = FLEXSPI_CFG_BLK_VERSION,                           /*版本:V1.4.0*/
            .readSampleClkSrc = kFlexSPIReadSampleClk_LoopbackInternally, /*内部环回*/
            .csHoldTime = 3u,                                             /*保持时间*/
            .csSetupTime = 3u,                                            /*建立时间*/
            .columnAddressWidth = 0u,                                     /*列地址宽度*/
            .deviceModeCfgEnable = 1u,                                    /*设备模式配置使能*/
            .deviceModeType = 1u,                                         /*Quad 使能命令*/
            .deviceModeSeq.seqNum = 1u,                                   /*LUT序列号*/
            .deviceModeSeq.seqId = 4u,                                    /*LUT序列索引*/
            .deviceModeArg = 0x000200,                                    /*设置 QE=1(S9)*/
            .deviceType = kFlexSpiDeviceType_SerialNOR,                   /*设备类型为nor flash*/
            .sflashPadType = kSerialFlash_4Pads,                          /*设备数据总线为4*/
            .serialClkFreq = kFlexSpiSerialClk_133MHz,                    /*flash 时钟*/
            .sflashA1Size = 32u * 1024u * 1024u,                          /*flash 大小32MBytes*/
            //.dataValidTime = {16u, 16u},
            .lookupTable =
                {
                    /*快速读命令(四线)*/
                    [0] = FLEXSPI_LUT_SEQ(CMD_SDR, FLEXSPI_1PAD, 0xEB, RADDR_SDR, FLEXSPI_4PAD, 0x18),
                    [1] = FLEXSPI_LUT_SEQ(DUMMY_SDR, FLEXSPI_4PAD, 0x06, READ_SDR, FLEXSPI_4PAD, 0x04),

                    /*读状态命令*/
                    [1 * 4] = FLEXSPI_LUT_SEQ(CMD_SDR, FLEXSPI_1PAD, 0x05, READ_SDR, FLEXSPI_1PAD, 0x04),
                    /*写使能命令*/
                    [3 * 4] = FLEXSPI_LUT_SEQ(CMD_SDR, FLEXSPI_1PAD, 0x06, STOP, FLEXSPI_1PAD, 0),
                    /*擦除扇区命令*/
                    [5 * 4] = FLEXSPI_LUT_SEQ(CMD_SDR, FLEXSPI_1PAD, 0x20, RADDR_SDR, FLEXSPI_1PAD, 0x04),
                    /*页编程命令(四线)*/
                    [9 * 4] = FLEXSPI_LUT_SEQ(CMD_SDR, FLEXSPI_1PAD, 0x32, RADDR_SDR, FLEXSPI_1PAD, 0x18),
                    [9 * 4 + 1] = FLEXSPI_LUT_SEQ(WRITE_SDR, FLEXSPI_4PAD, 0x04, STOP, FLEXSPI_1PAD, 0),
                    /*整片擦除*/
                    [11 * 4] = FLEXSPI_LUT_SEQ(CMD_SDR, FLEXSPI_1PAD, 0xc7, STOP, FLEXSPI_1PAD, 0),
                },
        },
    .pageSize = 256u,         /*页大小为256字节*/
    .sectorSize = 4u * 1024u, /*扇区大小为4k字节*/
};
#endif /* XIP_BOOT_HEADER_ENABLE */
- 从NXP下载Flashloader并解压
- 通过GDB将
Flashloader/flashloader.elf下载到内存并执行(步骤同RAM调试步骤,需要跳转程序入口点开始执行。) - 将ELF转换为
srec或ihx
arm-none-eabi-objcopy -O srec freertos_hello.elf freertos_hello.srec
- 连接USB OTG1,会有一个新USB HID设备连接到主机
- 运行下列命令初始化NOR Flash并写入程序
sudo ./blhost -u -V fill-memory 0x2000 0x04 0xc0000006
sudo ./blhost -u -V -t 30000 configure-memory 0x09 0x2000
sudo ./blhost -u -V -t 30000 flash-image ~/freertos_hello.srec erase
示例输出如下
imi415@imi415 ..er_RT1050_1.1/Tools/blhost/linux/amd64 % sudo ./blhost -u -V fill-memory 0x2000 0x04 0xc0000006
[sudo] imi415 のパスワード:
Inject command 'fill-memory'
Successful generic response to command 'fill-memory'
  - took 0.000 seconds
Response status = 0 (0x0) Success.
imi415@imi415 ..er_RT1050_1.1/Tools/blhost/linux/amd64 % sudo ./blhost -u -V -t 30000 configure-memory 0x09 0x2000
Inject command 'configure-memory'
Successful generic response to command 'configure-memory'
  - took 0.000 seconds
Response status = 0 (0x0) Success.
imi415@imi415 ..er_RT1050_1.1/Tools/blhost/linux/amd64 % sudo ./blhost -u -V -t 30000 flash-image ~/freertos_hello.srec erase
Inject command 'flash-image'
Successful generic response to command 'flash-erase-region'
Successful generic response to command 'flash-erase-region'
Successful generic response to command 'flash-erase-region'
Wrote 512 bytes to address 0x60000000
Successful response to command 'get-property(max-packet-size)'
Successful generic response to command 'write-memory'
(1/3)100% Completed!
Successful generic response to command 'write-memory'
Wrote 1120 bytes to address 0x60001000
Successful response to command 'get-property(max-packet-size)'
Successful generic response to command 'write-memory'
(2/3)100% Completed!
Successful generic response to command 'write-memory'
Wrote 24424 bytes to address 0x60002000
Successful response to command 'get-property(max-packet-size)'
Successful generic response to command 'write-memory'
(3/3)100% Completed!
Successful generic response to command 'write-memory'
  - took 0.006 seconds
Response status = 0 (0x0) Success.
根据Flash类型调整第一条命令的值。
- Flash 识别状态可以通过
sudo ./blhost -u -V list-memory
查看。输出类似如下
imi415@imi415 ..er_RT1050_1.1/Tools/blhost/linux/amd64 % sudo ./blhost -u -V -t 30000 list-memory
Inject command 'list-memory'
Internal Flash:
  No Internal Flash available
Internal RAM:
Successful response to command 'get-property(ram-start-address)'
Successful response to command 'get-property(ram-size-in-bytes)'
  Region 0: 0x00000000 - 0x0001ffff; Total size: 128 KB
Successful response to command 'get-property(ram-start-address)'
Successful response to command 'get-property(ram-size-in-bytes)'
  Region 1: 0x20000000 - 0x2001ffff; Total size: 128 KB
Successful response to command 'get-property(ram-start-address)'
Successful response to command 'get-property(ram-size-in-bytes)'
  Region 2: 0x20200000 - 0x2023ffff; Total size: 256 KB
Successful response to command 'get-property(ram-start-address)'
Successful response to command 'get-property(current-version)'
SEMC NOR:
  kStatusMemoryNotConfigured
Successful response to command 'get-property(external-memory-attributes)'
FlexSPI NOR:
  Start Address = 0x60000000  Total Size = 32 MB  Page Size = 256 bytes  Sector Size = 4 KB  Block Size = 64 KBSEMC NAND:
  kStatusMemoryNotConfigured
SPI NAND:
  kStatusMemoryNotConfigured
SPI NOR/EEPROM:
  kStatusMemoryNotConfigured
SD/SDHC:
  kStatusMemoryNotConfigured
MMC/eMMC:
  kStatusMemoryNotConfigured
  - took 0.001 seconds
总结
环境是第一步,代码尚未成功,同志仍需努力:)